ChatGPT connector · Setup guide
Your workspace,
open in ChatGPT.
Connect once and ChatGPT can search your notes, read your canvases, and write new work back into your workspace. Setup takes about two minutes.
Before you start
You need three things.
ChatGPT on the web
A Plus, Pro, Business, Enterprise, or Edu plan. Custom connectors are added in the browser, not the mobile app.
A Creator Notes account
Any account with at least one workspace. New here? Sign up first, then come back to this page.
A paid workspace for writes
Reading works on every plan. Creating and editing notes needs the connected workspace to be on an active plan.
Connect
Three steps, one approval.
Step 01
Turn on developer mode
In ChatGPT on the web, open Settings, go to Security and login, and turn on Developer mode. That is the switch that lets you add an MCP connector of your own.
ChatGPT marks it elevated risk, and it means it: developer mode lets you point ChatGPT at any server, vetted or not. Add connectors you trust, and read the next step before you paste a URL from anywhere else.
ChatGPT reorganizes its settings from time to time. If the toggle isn't there, search the settings for “developer”.
ChatGPT · Settings · Security and login
Developer mode
Elevated riskAllows you to add unverified connectors that could modify or erase data permanently. Use at your own risk.
Illustration of ChatGPT's settings. Its interface may differ slightly.
Step 02
Add the connector
Still in Settings, open Plugins and click the + button, which appears once developer mode is on. Name it whatever you like, paste the server URL below exactly as it is, and set authentication to OAuth. Then hit Create.
https://creatornotes.app/api/mcpCopyChatGPT · Settings · Plugins · New connector
Name
Creator NotesDescription
My notes and canvasesMCP server URL
https://creatornotes.app/api/mcpAuthentication
OAuthIllustration of ChatGPT's new-connector form, filled in.
Step 03
Approve access to one workspace
ChatGPT sends you to creatornotes.app to sign in and approve the connection. You pick exactly one workspace, and that choice is enforced on every call that follows. ChatGPT can never reach the workspaces you didn't pick.
Click Allow access and you're connected. ChatGPT scans the available tools and is ready to work.
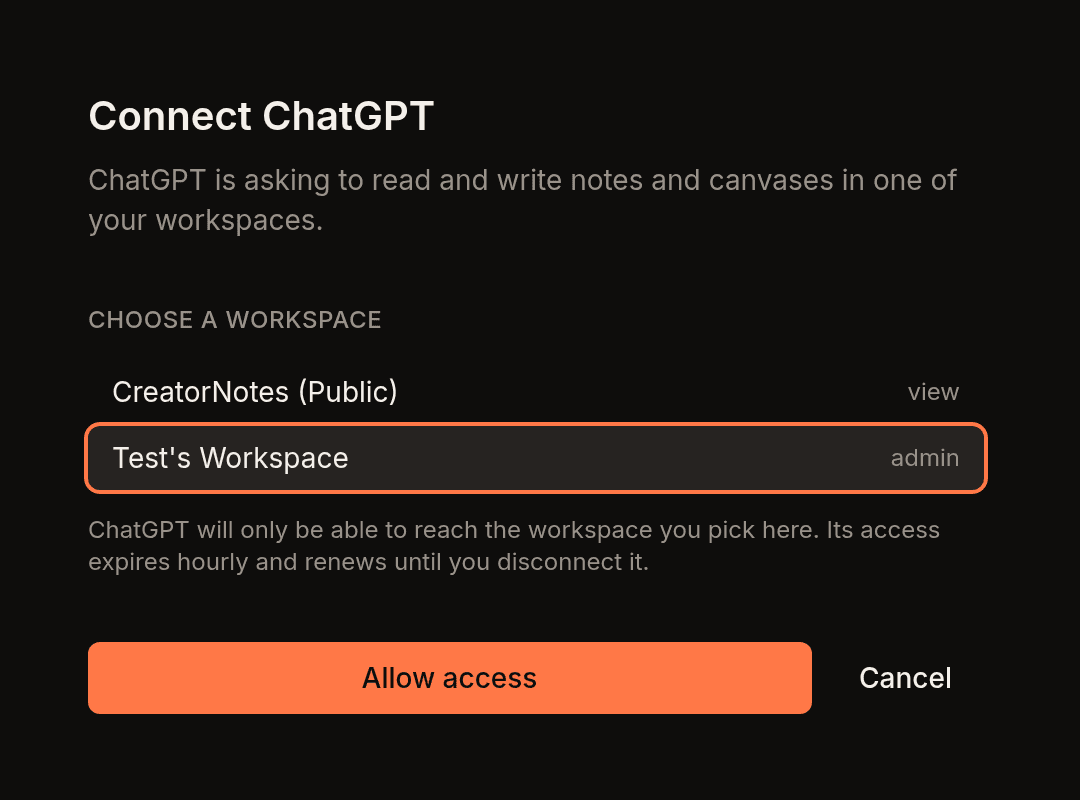
The real consent screen. One workspace, your explicit pick.
Working with it
Now just ask.
ChatGPT sees your workspace the way you do: notes with types, relationships between them, and canvases where the thinking lives. Talk about your work in plain language.
“Search my workspace for everything we know about churn.”
“Summarize the Launch canvas and list the open questions.”
“Turn this conversation into Decision notes and place them on the Planning canvas.”
“Show me the Roadmap canvas.”
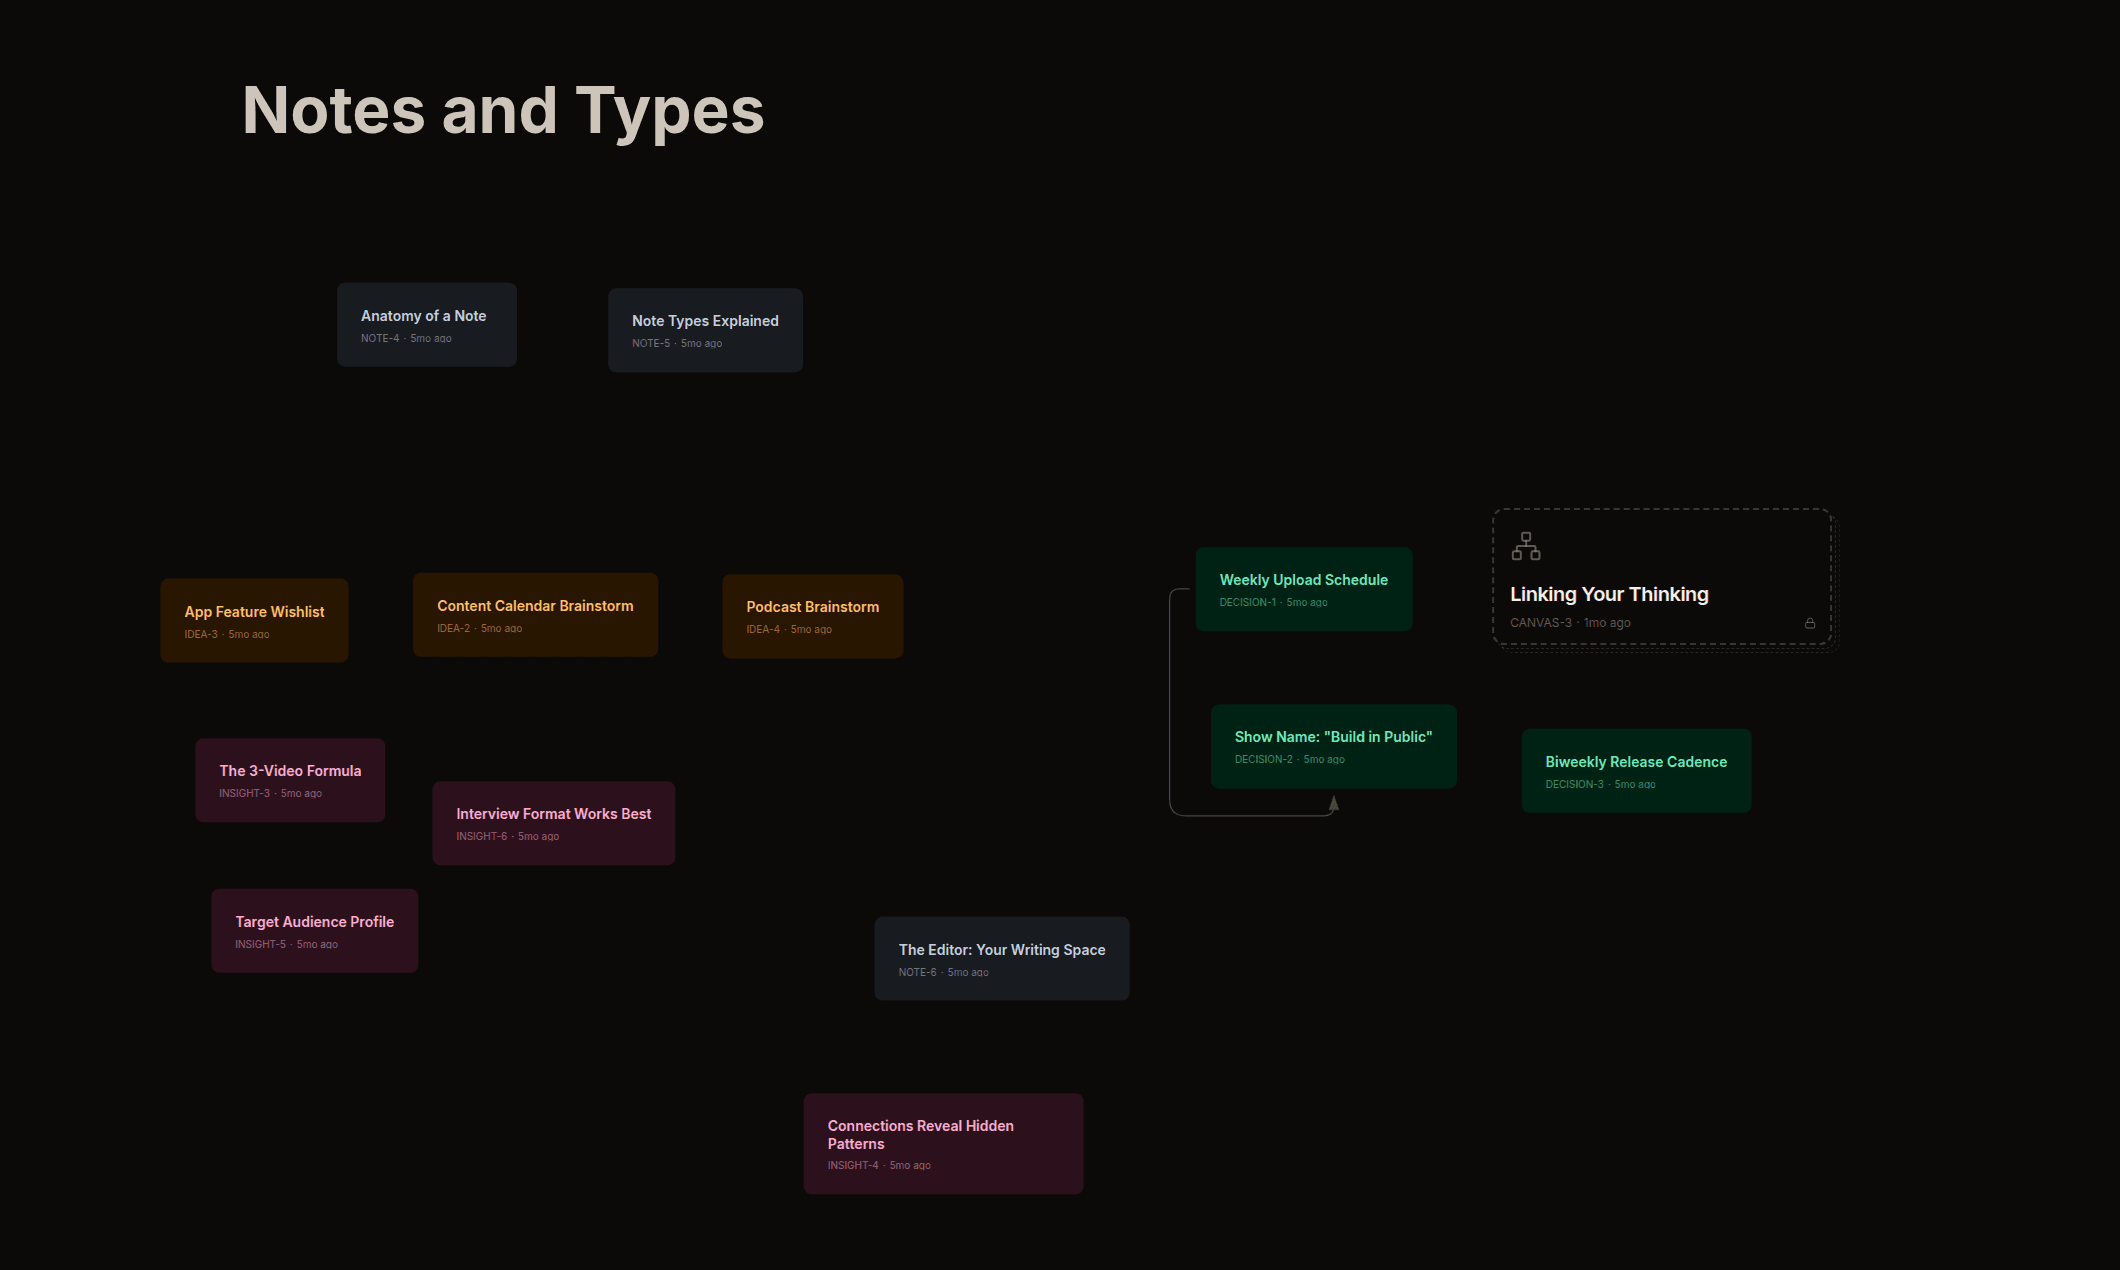
Ask for a canvas and ChatGPT renders it right in the chat: an interactive, pannable view of the real thing, not a text dump.
The safety net
Every change,
on the record.
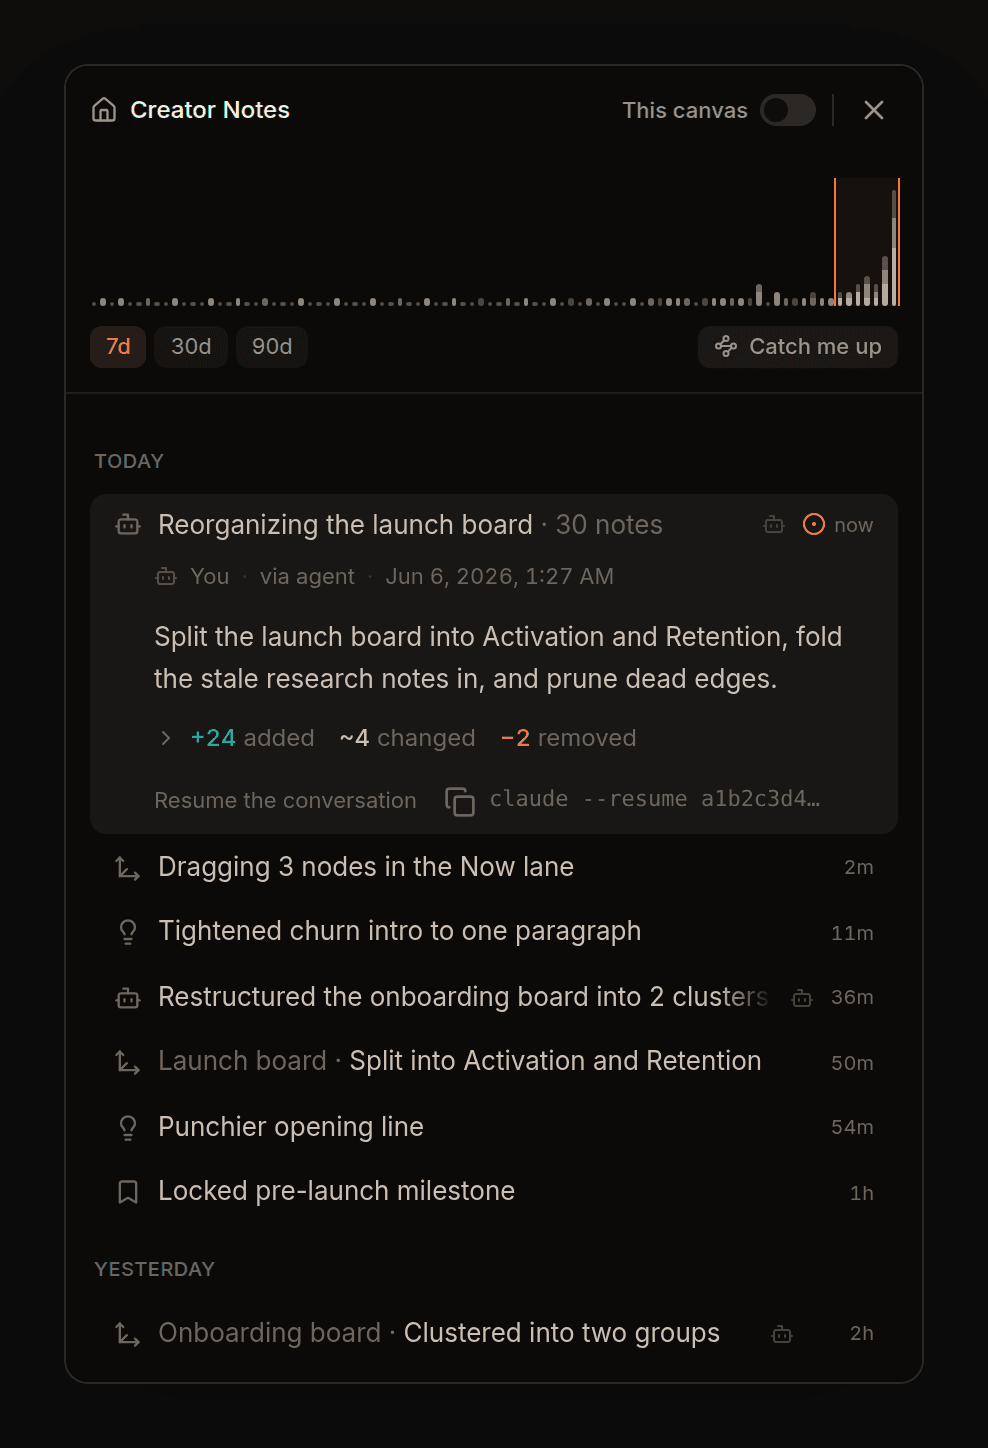
Before ChatGPT writes anything, it has to state what it's doing and why. That intent becomes the change description on your workspace timeline, so a ChatGPT edit lands as one attributable, revertable change. Nothing anonymous, nothing silent.
Writes appear on the timeline like any other change, labeled with what ChatGPT set out to do.
The connection uses OAuth with per-workspace consent. Access expires hourly and renews until you disconnect.
One workspace per connection. The rest of your account stays out of reach.
If something goes sideways
Almost everything is fixed by refreshing.
Tool calls suddenly error, or the connector goes quiet
ChatGPT reads the connector’s tool list once, at connect time, and does not re-read it after we ship updates. In ChatGPT, go to Settings · Plugins, open the Creator Notes connector and choose Refresh, then start a new chat. Reconnecting on its own only re-authorizes, and an open chat keeps the tool list it started with.
Reads work but writes are rejected
Writing needs the connected workspace to be on an active plan. Upgrade the workspace, or connect a workspace that already is.
ChatGPT is connected to the wrong workspace
The workspace choice is fixed at approval time on purpose. Remove the connector under Settings · Plugins, add it again, and pick the workspace you meant.
Two minutes of setup.
A workspace ChatGPT can use.
Create your workspace first, then add the connector in ChatGPT.